

Before you begin
This chapter covers the essential preparations you need to make before you install your server. Taking a few minutes to review safety guidelines and plan your workspace will help ensure a smooth and safe installation.
Safety precautions
Your safety is the top priority. This server is designed for use in a Restricted Access Location by trained technicians. Always follow these precautions to protect yourself and the equipment.
Electrical safety
Shut down and unplug first: Before you open the chassis or install any components, always shut down the server through the operating system and disconnect all power cords from the wall outlet.
Use approved power cords: Only use the power cords that came with your server or are certified for this equipment. Ensure they are connected to a properly grounded outlet to prevent electrical hazards.
Pro Tip: Establish a safe workspace Before you start, clear your workspace of any liquids, food, or unnecessary clutter. This simple step reduces the risk of accidental spills or damage.
Hardware handling safety
Beware of hot surfaces: Components like the CPU, heatsinks, and power supply units (PSUs) can get very hot during operation. Allow the system to cool down before you touch them.
Keep fingers clear of fans: The system fans can spin at very high speeds. Never place your fingers, tools, or any objects inside the chassis when the fans are active.
Rack installation safety
Stabilize the rack: If your rack has them, extend the leveling jacks at the bottom before you install the server. For multiple racks, couple them together securely.
Load heaviest items at the bottom: To prevent the rack from becoming top-heavy and tipping over, always install your heaviest equipment, like UPS units and storage arrays, in the bottom of the rack first.
Extend only one server at a time: Extending more than one server from the rack simultaneously can make it unstable.
What's in the box
Before you begin the installation, inspect the shipping box for any signs of damage. If you notice anything, contact the shipping carrier and your vendor immediately.
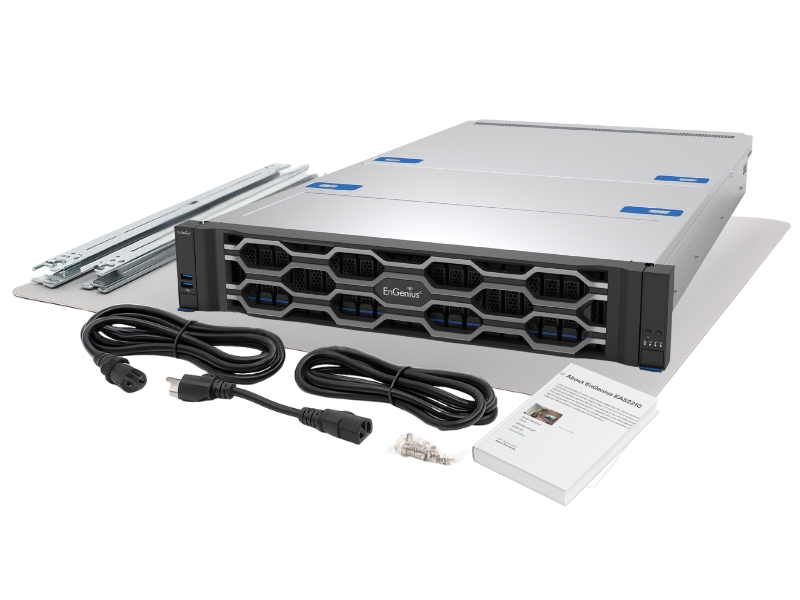
Open the box and make sure you have all the following items:
[ ] The EAS2210 server chassis
[Optional] One set of rack rails (left and right assembly)
[ ] Two server power cords
[Optional] A screw kit for mounting the rails and chassis
[ ] Server Product Card
Planning your rack environment
A well-planned environment is key to a reliable server deployment. Choose a location that meets these criteria.
Ensure proper clearance. You'll need clear access to the front and back of the rack for installation and maintenance.
Front: At least 64 cm (25 in) of clearance.
Rear: At least 76 cm (30 in) of clearance for cabling and airflow.
Maintain good airflow. The server needs a constant flow of cool air to operate correctly.
The environment should be clean, dust-free, and well-ventilated.
Do not block any vents on the front or rear of the chassis.
The ambient temperature in the rack should not exceed the server's rated operating range.
Common Mistake: Blocking airflow
A common error is to place equipment or route cables in a way that blocks the server's air intakes (front) or exhausts (rear). This can cause components to overheat, leading to performance throttling or even system shutdowns. Always keep the airflow path clear.
Provide reliable power. To protect the system from power surges or outages, we strongly recommend connecting the server to a regulated uninterruptible power supply (UPS).
Last updated