

ECP214
Cloud Managed 2U 12A Smart PDU with 14 Metered Outlets (ECP214)
Introduction
This Quick Start Guide is designed to guide you through installing the PDU 14P 12A 100-120V, model ECP214, including hardware mounting and configuration.
Package Contents


System Requirements
Web Browser:
Google Chrome (105.0.5195.127 or later)
Microsoft Edge (112.0.1722.48 or later)
Network Requirements
Before you get started, please make sure your network environment is DHCP-enabled. EnGenius PDU is assigned with an IP address dynamically by the DHCP server. You could check the given IP address from PDU's LCD. The IP address is shown under Menu>information.
Hardware Overview
Ports

LEDs

Safety Precautions
Read the following before installing or operating the Power Distribution Units (PDU)
Use only the supplied hardware to attach the mounting brackets.
Intended to be used in a location having equipotential bonding (such as a telecommunication center, a dedicated computer room
Installation instructions that require verification of the PROTECTIVE EARTHING connection of the socket-outlet by a SKILLED PERSON
Do not use extension cords or adapters with this PDU
Never install a PDU or associated wiring or equipment during a lightning storm
Ensure that the power cord, plug, and socket are in good condition
Hardware Installation
Place on a Flat Surface in the Computer Room
Suitable for installation in Information Technology Rooms in accordance with Article 645 of the National Electrical Code and NFPA 75. (Marking or Instruction) The PDU can be secured using the screws and rack ears included in the accessory kit
Peut être installé dans des salles de matériel de traitement de l’information conformément à l’article 645 du National Electrical Code et à la NFPA 75. (Marking or Instruction)
Step 1: Attach the Rubber Footpads to the bottom corners of the PDU. The Rubber Footpads help secure the PDU and protect it from vibration and shock when stacked.
Step 2: Use (M4 x 6)screws to attach the rack ears to both sides of the device. This will allow you to position the PDU on any flat surface.

Step 3: Attach the bracket with 4(T4x19) to secure the PDU firmly to the flat surface.

Rack Mount
Securely attach the device with rack ears onto the rack using screws. Make sure it is securely attached and not wobbling.
(Due to different rack specifications, we have not included rack mounting screws. We recommend using M5 x 12 screws along with washers for securing.)

Power On Device
Connect the Power cord to the front of the PDU, and then plug it into the power outlet.

Management Plane
EnGenius Cloud To-Go provides flexibility to manage your devices based on your network planning and deployment.
Option A: Cloud Management
Option B: Standalone Configuration
Cloud Management
Manage and monitor the PDU through the EnGenius Cloud To-Go with a mobile app or through the web portal.
EnGenius Cloud To-Go (iOS/Android)
⬇️ Download the Cloud To-Go mobile app here

Standalone Configuration
You can locate the computer, connect to the same network (subnet) as the PDU and use the web browser to access the device's local web GUI page for configurations whenever the device is in Standalone mode.
Option A: Configure with EnGenius Cloud
Step 1: Connecting to Ethernet
Connect the Ethernet cable from the EnGenius Switch directly to the DHCP-enabled network and make sure the PDU can reach the Internet.
Step2: Register Device
You can register the device either by Cloud To-Go mobile app or the EnGenius Cloud platform.
Cloud To-Go Mobile App
Open and log in to the EnGenius Cloud To-Go mobile app.
Scan the QR code on the back of the device via the app.

3. If the camera successfully scans a QR code, the app will display the Device Information. You could tap "Register" to complete the Registration.
4. Registered devices will be shown on the Inventory & License page. Upon sliding left the device, you can click "Add to Network" to add the device to your designated Network.

EnGenius Cloud Platform
Log into the EnGenius Cloud Platform: https://cloud.engenius.ai/.
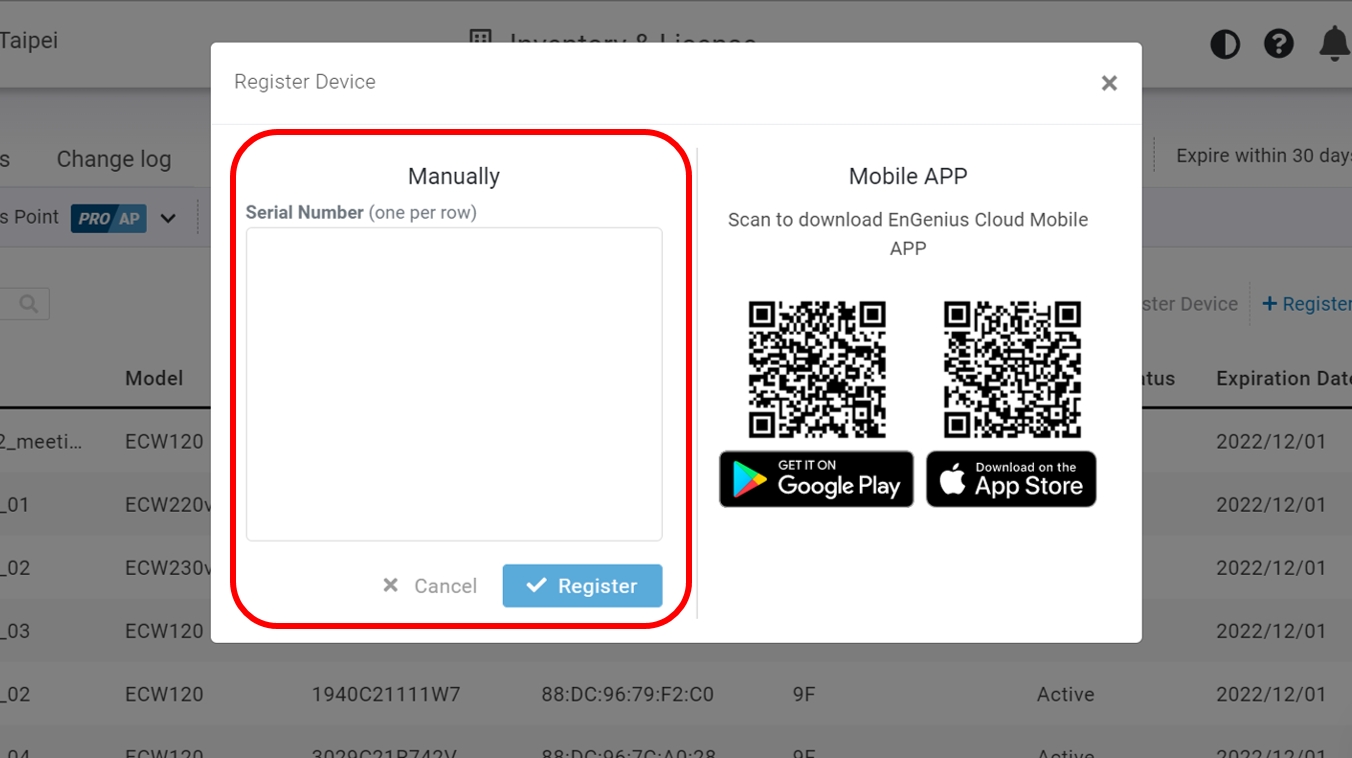
Go to the home > Inventory page and click "Register Device".
Enter the Serial Number of the device(s) for device registration. Please refer to "User Manual-Registering Devices to Organization".
4. Select the registered device and click "Assign to Network" to add the device to your designated Network.
Troubleshooting
If your PDU device cannot be managed by the EnGenius Cloud Platform, there might be a problem with connecting to EnGenius Cloud.
To troubleshoot the connection issue, you may log in to the PDU Local Web (optionB)page:
Make sure that your host system has same layer-2 network as the PUD. By default, the computer should get the IP address in this segment 192.168.10.x.
Under your web browser, enter the URL: http://192.168.10.80 to access the PDU's local status page web interface.
You can review the device status after logging into the PDU with the default admin account/password (admin/admin).
Check the information on the Device Status and take action if necessary.
Option B: Standalone Configuration
Step 1: Access to Local Web
Connect your computer to the PDU and ensure its IP address is in the same subnet.
Launch your web browser and enter the URL: http://192.168.10.80 to access the PDU's local web GUI.

Use the default login credential (ID/PWD: admin/admin) to log in to the PDU's local web page.


Step2: Configure and Manage the Device
After logging in to the device's local web page, navigate to the left-side menu to configure and manage the PDU accordingly.

Last updated
Was this helpful?